
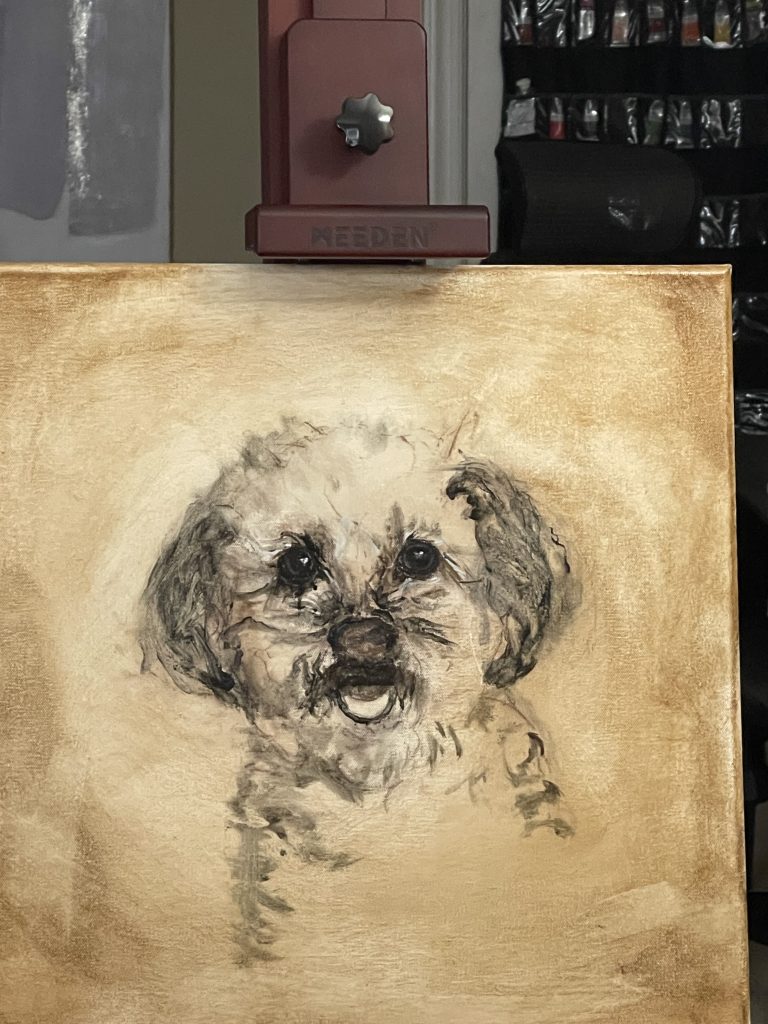
This is a mid “block in” of a new pet portrait that I am doing for a customer.
Blocking in a pet portrait or any oil painting is an essential step that lays the foundation for the detailed work to follow. I thought I would dedicate this post to a step-by-step guide to help you through the process:
Step-by-Step Guide to Blocking In a Pet Portrait
Materials Needed:
– Canvas or painting panel
– Oil paints
– Brushes (various sizes)
– Palette and palette knife
– Turpentine or odorless mineral spirits
– Linseed oil or another medium
– Pencil or charcoal for initial sketching
– Reference photo of the pet
– Easel
Steps:
- Prepare Your Workspace:
Set up your easel and organize your painting materials.
Ensure you have good lighting to see your colors accurately.
2. Sketch the Basic Outline:
Using a pencil or charcoal, lightly sketch the basic outline of the pet on your canvas. Focus on capturing the proportions and major features like the eyes, nose, ears, and overall shape of the body.
Mix Your Base Colors:
On your palette, mix the base colors you’ll need for blocking in. This typically includes the main colors of the pet’s fur, the background, and any other large areas of color.
Remember to keep your colors slightly more muted and less detailed at this stage.
3. Block in the Background:
Start by applying a thin layer of paint to block in the background. Use larger brushes and broad strokes to cover the canvas quickly.
This step helps establish the overall color scheme and mood of the painting.
Block in the Main Shapes:
Move on to the pet itself, blocking in the main shapes with large areas of color. Focus on the general color and value of different parts of the pet.
Use larger brushes and avoid getting caught up in details at this stage. Aim to cover the entire canvas with paint, leaving no white areas.
4. Establish Light and Shadow:
Identify the light source in your reference photo and block in the light and shadow areas on the pet.
Use a slightly darker tone for the shadows and a lighter tone for the highlights to create a sense of depth and form.
Refine the Shapes:
Gradually refine the shapes and adjust the colors and values as needed. This is still a loose and broad stage, so don’t worry about details yet.
Use medium-sized brushes to define the edges of the major shapes and to blend the transition areas between light and shadow.
Check Proportions and Adjust:
Step back from your painting and check the overall proportions and placement of the elements.
Make any necessary adjustments to ensure the likeness of the pet is accurate before moving on to the details.
5. Let It Dry:
Allow the blocked-in layer to dry if needed. This can help in the next stages of painting, especially if you plan to work with glazes or finer details.
Begin Detailing:
Once the blocked-in layer is dry or set, you can begin adding finer details, such as the texture of the fur, the sparkle in the eyes, and the intricate features that will bring the portrait to life.
6. Tips:
* Use Mediums: Add a small amount of linseed oil or another medium to your paint to improve the flow and make the blocking-in process smoother.
Work Thin to Thick: Start with thinner layers of paint and build up to thicker layers as you progress.
*Stay Flexible: Be prepared to make adjustments as you go. Blocking in is about establishing a foundation, so it’s okay to refine and change things as needed.
Blocking in a pet portrait is a vital step that sets the stage for a successful and detailed painting. Take your time to ensure the composition, proportions, and color values are correct before moving on to the more intricate aspects of your work.
Leave a Reply